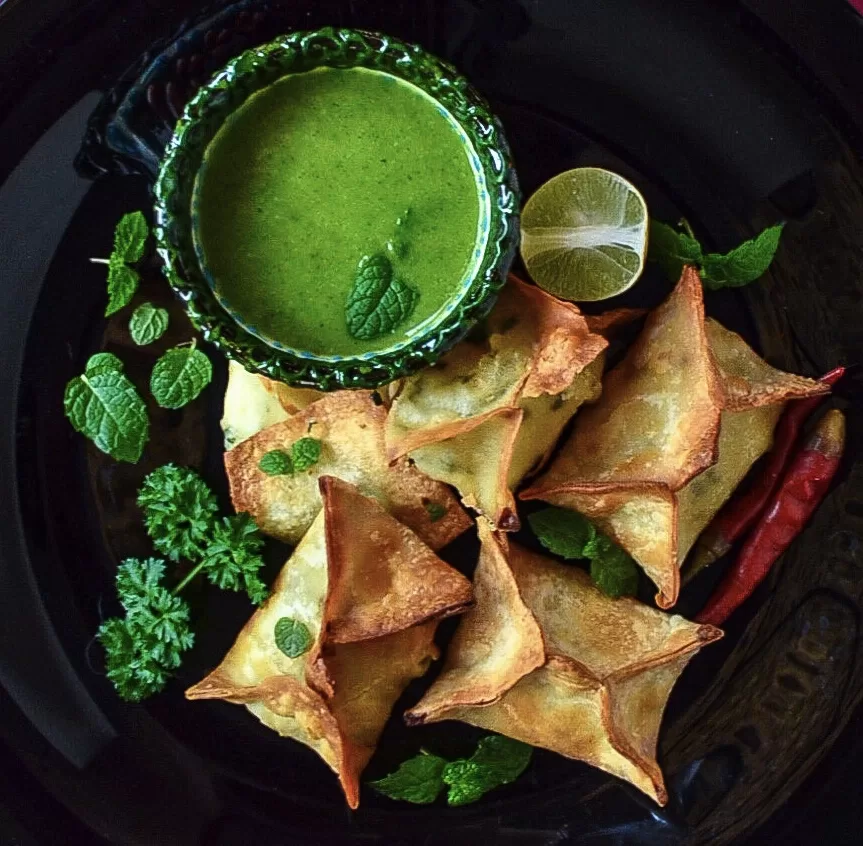
 Paneer Hara Masala Rangoons are a flavourful Pakistani style take on Panda Express’s popular cream cheese rangoons.
I have never had Panda Express so my understanding of the flavour profile of the chain’s cream cheese rangoons and their texture is based solely on the description and copycat recipes found online.
Paneer, cheddar and green masala ingredients along with dry aromatics make up the rangoon filling. Instead of wonton wrappers, I use samosa patti or spring roll patti cut into squares. A simple but punchy green chutney to dip the crisp Paneer Hara Masala Rangoons in rounds things off nicely.
My hardcore Pakistani tastebuds love desi-fying recipes wherever they feel that particular fusion will work. And I feel it works rather well here.

Make Ahead & Freeze Paneer Hara Masala Rangoons:
A stash of frozen Paneer Hara Masala Rangoons on hand means that you can fry, air fry or bake these in no time should you have guests over or should a craving for hot melty flavoursome cheese encased in a crisp filling suddenly arise.
Follow the recipe till you’ve completed the “Assembly” part.
Then freeze flat on a plastic wrap lined tray or cookie sheet overnight.
Once frozen solid, place in an airtight container in a single layer, using plastic wrap between layers.

Paneer Hara Masala Rangoons
Paneer Hara Masala Rangoons: crisp cheesy bags with coriander, mint, green onion & green chillies for a uniquely desi take on cream cheese rangoons!
Recipe Type: Starter & Snack
Author: Alice In Eatland
Cook Time: 10 Minutes
Total Time: 30 Minutes
Serves: 2-3
INGREDIENTS
Rangoons
- 1 cup grated paneer, store bought or homemade
- 3/4 cup grated cheddar cheese
- 1/2 cup very finely sliced spring onion (green part only)
- 6 – 8 green chillies, deseeded & finely chopped 1/2 – 1 teaspoon garlic powder
- 1/4 – 1/2 teaspoon onion powder
- Salt
- 2-4 tablespoons cream or cream cheese
Slurry
- 2-4 tablespoons plain flour
- 1/2 – 1 cup water
Wrappers
- Samosa patti, spring roll patti/wrappers or wonton wrappers (cut into 3” squares)
Green Chutney
- Handful fresh coriander leaves
- Handful fresh mint leaves
- 1/4” piece ginger, peeled
- 1 clove garlic, peeled
- 2-4 fresh green chillies
- 1/2 a slice of bread
- Splash of white vinegar
- Pinch of sugar
- 1/2 teaspoon ground cumin
- Fresh lemon juice
- Salt
- Drinking water
METHOD
Filling
- Mix all the filling ingredients, adding enough cream or cream cheese to make a sticky mixture that comes together.
- Divide into 12-14 equal portions and shape into balls with wet palms.
Slurry
- Whisk flour into the water until combined and heat, whisking until thick, opaque and bubbly.
- Cool completely.
Assembly
- Place a ball of filling in the centre of a samosa patti square (or spring roll patti or wonton wrapper, whichever you are using).
- Rub slurry along all 4 edges.
- Bring the opposite corners of the square to meet in the middle and pinch together, sealing the sides as well. (see image 2 above for reference).
Frying
- Deep fry till golden.
- To air fry, brush rangoons and your air fryer basket both with oil and cook 10 minutes at 200 degrees C or until golden.
Freezing
- To freeze, lay uncooked rangoons flat on a plastic wrap lined tray or cookie sheet and freeze 2-4 hours or till frozen solid.
- Place in an airtight container in a single layer, using plastic wrap between layers.
Green Chutney
Blend all ingredients together either with a stick blender or in a regular blender until the desired consistency is reached.

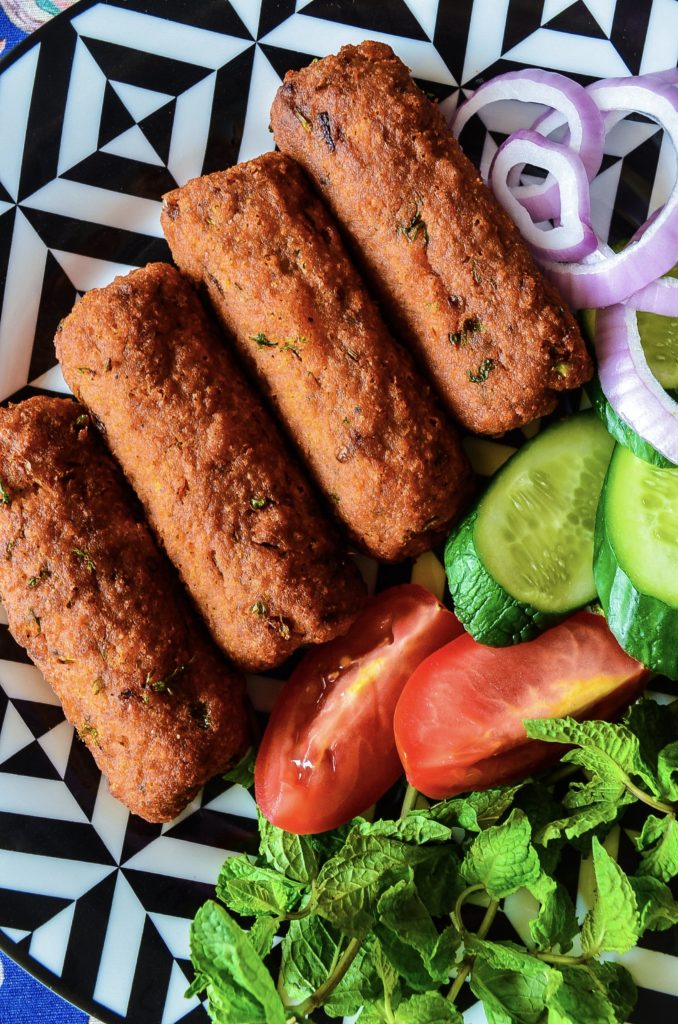
 Tamatar Paneer, a vibrantly spiced Hyderabadi-style tomato curry with “crisp-on-the-outside-creamy-on-the-inside” grilled homemade paneer wedges.


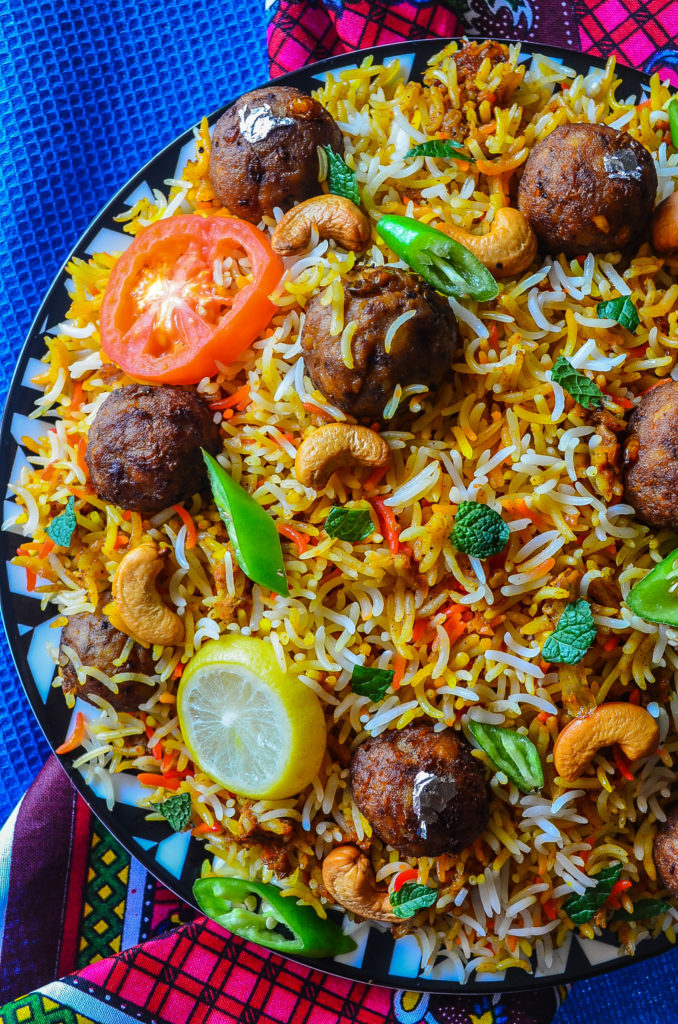
 Tikka Kofta Biryani: juicy barbecue-smoked tikka flavoured plant-based koftay on a bed of fluffy fragrant masala rice, the stuff of biryani dreams!